A lot of Docker images, like nginx, support configuration using files. The documentation recommends that you create the file locally and then mount it to your container with -v /host/path/nginx.conf:/etc/nginx/nginx.conf:ro. Other images, like grafana and redis, support similar configuration methods.
But this method doesn’t work on Fargate because the server running your containers doesn’t have access to your local files. So how can you mount configuration files into containers in Fargate?
One option is baking the configuration file into your image. The downside is that this requires building, storing, and maintaining your own image. It also makes changing your configuration much more difficult.
A simpler method is using a sidecar container that writes the configuration to a volume shared by both containers. The sidecar container uses images like bash or amazon/aws-cli. It can read the configuration from an environment variable, from SSM or even S3.
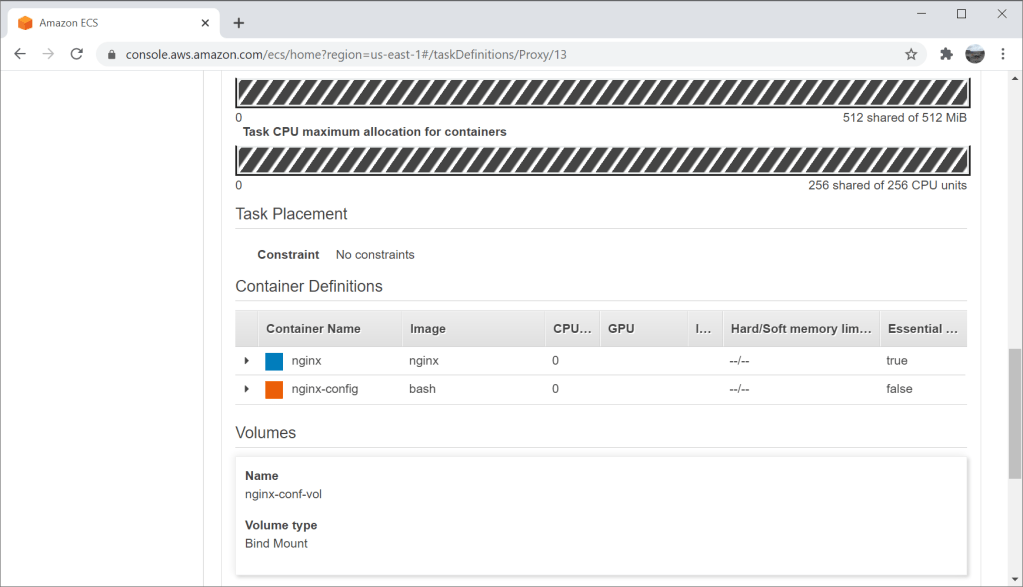
To add a sidecar container to your existing task definition:
- Define a transient volume. When doing this in Fargate Console select Bind Mount type.
- Add a new sidebar container definition to your task. Use
bashoramazon/aws-clias the image. - Mount the new volume into your new sidecar container.
- Update the command of sidecar container to read the configuration and write it to the mounting point.
- Update your existing container definition to also mount the same volume to where the image is expecting the configuration file.
- Set your existing container to depend on the new sidecar container to avoid any race conditions.
For example, if we want to configure nginx container using the following configuration file, we can use bash to write it to /etc/nginx/nginx.conf. To avoid any issues with newlines, we will base64 encode the configuration file and put it in the environment of the sidecar container.
events {
  worker_connections  1024;
}

http {
  server {
    listen 80;
    location / {
      proxy_pass https://kichik.com;
    }
  }
}
All this takes just a few lines with CloudFormation but can be done using other APIs as well. As you can see, this template defines a task definition with two containers. One container is nginx itself, and the other is the sidecar container. Both of them mount the same volume. The main container depends on the sidecar container. The sidecar container takes the configuration from the environment, decodes it using base64 and writes it to /etc/nginx/nginx.conf. Since both containers use the same volume, the main container will see and use this configuration file.
Resources:
  FargateTask:
    Type: AWS::ECS::TaskDefinition
    Properties:
      NetworkMode: awsvpc
      RequiresCompatibilities:
        - FARGATE
      Cpu: 256
      Memory: 512
      Volumes:
        - Name: nginx-conf-vol
          Host: {}
      ContainerDefinitions:
        - Name: nginx
          Image: nginx
          Essential: true
          DependsOn:
          - Condition: COMPLETE
            ContainerName: nginx-config
          PortMappings:
            - ContainerPort: 80
          MountPoints:
            - ContainerPath: /etc/nginx
              SourceVolume: nginx-conf-vol
        - Name: nginx-config
          Image: bash
          Essential: false
          Command:
            - -c
            - echo $DATA | base64 -d - | tee /etc/nginx/nginx.conf
          Environment:
            - Name: DATA
              Value:
                Fn::Base64: |
                  events {
                    worker_connections  1024;
                  }

                  http {
                    server {
                      listen 80;
                      location / {
                        proxy_pass https://kichik.com;
                      }
                    }
                  }
          MountPoints:
            - ContainerPath: /etc/nginx
              SourceVolume: nginx-conf-vol
After deploying this template, you can launch a Fargate task and the result will be a simple web server proxying all requests back to this blog.
This is a very raw example. You would usually want to enable logs, and get configuration from somewhere dynamic in production. But it shows the basics of this sidecar method and can be applied to any Docker image that requires mounting a configuration file.

FYI (might be new features since you wrote the article)
It is possible to embed the nginx configuration directly into the template via:
Fn::Base64: |
events {
worker_connections 1024;
}
http {
server {
listen 80;
location / {
proxy_pass https://kichik.com;
}
}
}
if you need to substitute in parameters (or secrets!) you can do:
Fn::Base64:
Fn::Sub:
– |
events {
worker_connections ${CONNECTIONS};
}
http {
server {
listen ${PORT};
location / {
proxy_pass https://${ENDPOINT}.com;
}
}
}
– ENDPOINT: “kichik.com”
CONNECTIONS: “1024”
PORT: “80”
That’s a much better idea. Thanks!
Thank you for the blog post! Embedding it right in the template makes it really simple!